Photography fans often hear about ND filters, but many wonder what these tools actually do. ND filters serve a key role in photo quality and control.
These special glass pieces fit over camera lenses and change how much light enters the camera. The results can turn good photos into great ones with just one simple add-on.
This blog will explain how ND filters work, when to use them, and common mistakes tob avoid when using ND Filters.
Keep reading to learn how these small tools can make a big change in your photos.
What is an ND Filter?
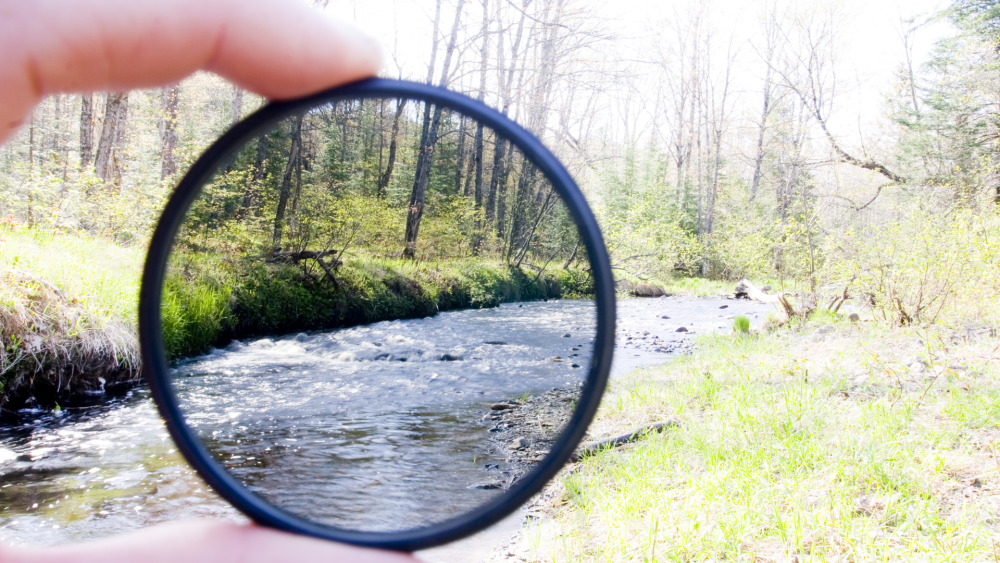
ND stands for Neutral Density. These filters look like small glass discs that attach to the front of camera lenses.
Their main job is to reduce the amount of light that reaches the camera sensor without changing colors in the photo.
Think of them as sunglasses for your camera. They come in various strengths, from barely noticeable to very dark.
ND filters help photographers control exposure in bright conditions and allow for certain photo tricks that would be hard to pull off otherwise. They’re simple tools that solve common problems when shooting in tough light situations.
How ND Filters Work?
ND filters work by limiting light without affecting color quality. They use special glass or resin with tiny particles that block light waves evenly across all colors.
When you put an ND filter on your lens, it creates a barrier that reduces the total amount of light hitting your camera’s sensor.
This simple process gives you more control over your camera settings even in very bright conditions.
Here’s how these filters do their job:
- They Reduce Light Evenly: ND filters cut down light across all wavelengths equally, which means they don’t add color casts to your photos like some other filters might.
- They Allow Slower Shutter Speeds: By blocking light, these filters let you use slower shutter speeds in bright settings, which helps capture motion effects like smooth water or clouds.
- They Enable Wider Apertures: With less light coming in, you can open up your aperture wider in bright light, creating that nice blurry background effect even on sunny days.
- They Come in Different Strengths: ND filters are rated by how many “stops” of light they block, from 1-stop (mild) to 10+ stops (very dark), giving you options for different shooting needs.
- They Stack for More Effect: Some photographers put multiple ND filters together to get even more light reduction when one filter isn’t strong enough.
Benefits of Using ND Filters
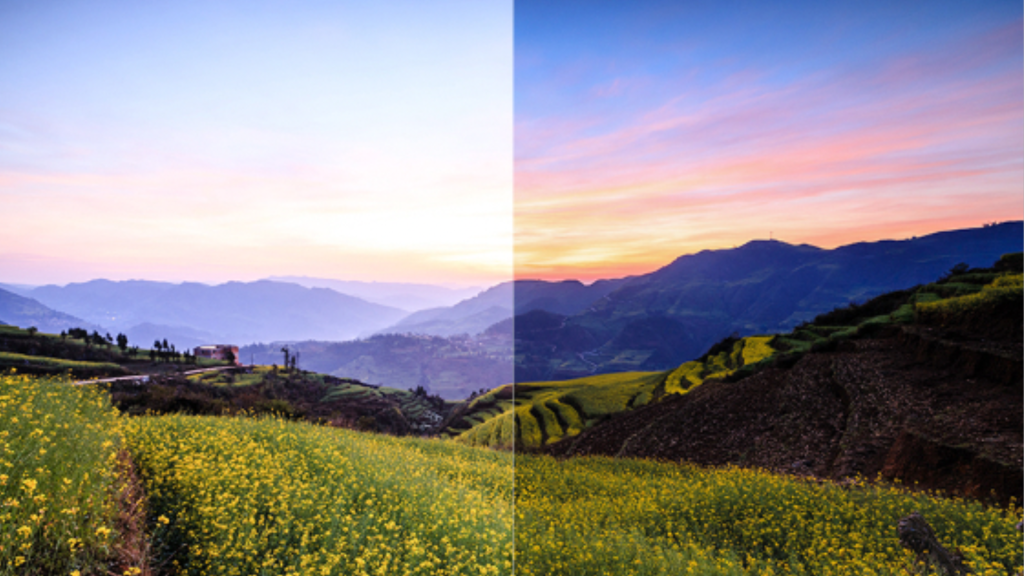
ND filters offer several perks that can boost your photo quality. These tools expand what’s possible with your camera in challenging light conditions.
They solve common problems that many photographers face and open up new creative options without requiring the purchase of an expensive camera.
- They allow for long exposure shots in daylight, creating smooth water effects in rivers and waterfalls.
- Greatly helps manage very bright scenes without overexposing important parts of your photo.
- They let you use wider apertures in bright light, keeping that soft background blur even on sunny days.
- And, they also reduce glare and reflections when shooting through glass or over water surfaces.
- They can add motion blur to moving objects while keeping still subjects sharp, giving your images a sense of speed.
Why Photographers Use ND Filters?
Photographers turn to ND filters when they need more control over their shots. On bright days, cameras often struggle with too much light.
An ND filter fixes this problem by cutting down excess brightness. This gives photographers room to play with camera settings that would otherwise result in white, washed-out images.
Many pros keep these filters in their bags because they’re small, simple to use, and solve tricky light problems without complex editing work later.
They’re one of the most useful tools for getting good shots in tough outdoor settings.
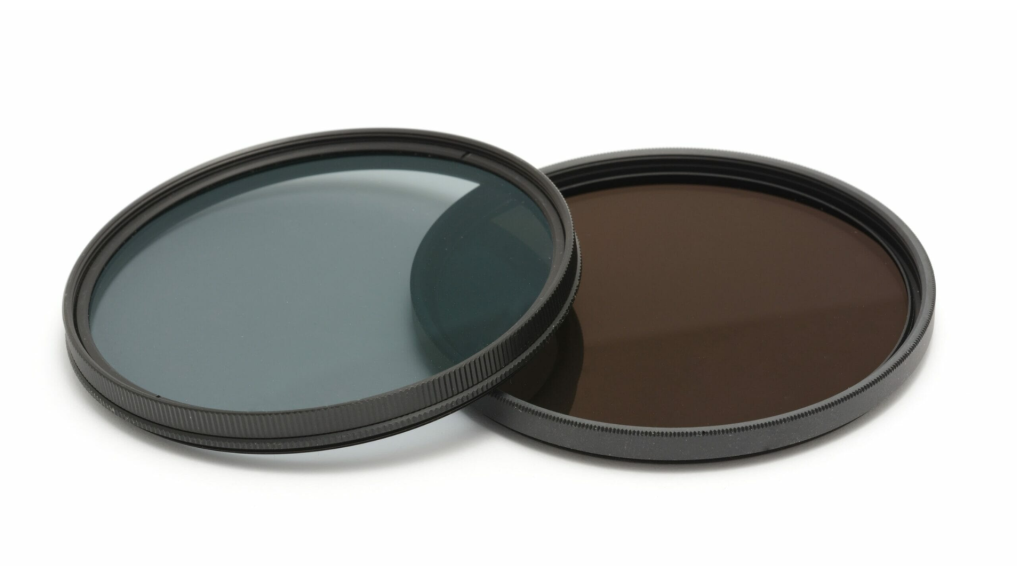
Different Types of ND Filters
ND filters come in several forms, each with its own setup and best uses. The choice between types often depends on your camera, shooting style, and what you plan to photograph.
Most photographers have at least one type in their bag, but many use a mix based on different shooting needs. Here’s a breakdown of the main types you’ll find in stores and what makes each one unique.
| Type | Description |
|---|---|
| Circular ND Filters | Screw directly onto your lens like a cap. Easy to use and carry. Come in fixed strengths. Good for beginners. Less likely to leak light. |
| Square/Rectangular ND Filters | Slide into a holder that attaches to your lens. It can be swapped quickly. It is popular with landscape photographers because it allows for more precise positioning. |
| Variable ND Filters | Circular filters that twist to adjust darkness—like having multiple filters in one—save space in your bag. However, at stronger settings, they can cause cross-patterns. |
| Graduated ND Filters | Dark on top, clear on bottom, these shades help balance bright skies with darker ground. They are available in soft and hard edge versions for different horizon types. |
| Center ND Filters | Dark in the middle, clear at the edges, this effect is used for specific creative effects and helps control bright light sources in the center of the frame. |
Common Mistakes to Avoid When Using ND Filters
Even skilled photographers make errors when working with ND filters. These simple tools can be tricky to use correctly at first.
Being aware of these common pitfalls will help you get better results from the start and avoid wasted time in the field.
- Forgetting to Refocus: Adding or removing an ND filter can shift your focus point. Always check your focus again after making any filter changes.
- Not Cleaning Filters: Dust and fingerprints on ND filters show up much more in photos than you might expect. Clean them gently before each use.
- Using Auto White Balance: ND filters can sometimes cause color shifts. Set a manual white balance or shoot in RAW to fix this later.
- Ignoring Light Leaks: Light can sneak in around filter edges. Check for gaps and use filter holder hoods when needed.
- Not Calculating Exposure: Strong ND filters need big exposure adjustments. Use the filter’s stop rating to figure out your new settings.
- Shooting Handheld with Long Exposures: Even slight camera movement ruins long exposure shots. Always use a sturdy tripod with ND filters.
- Relying on The Viewfinder: With dark ND filters, you may not see much. Use live view or check your test shots carefully instead.
Summing It Up
ND filters can make a huge difference in your photos once you know how to use them. They solve many common light problems that limit what’s possible with just a camera alone.
From smooth water effects to blurry clouds, these small tools add new options to your photo skills. Now that you understand what ND filters do, how they work, and the types available, you’re ready to try them out.
Remember to avoid the common mistakes we covered, and you’ll get great results faster.
Want to learn more about photography tools? Check out our other guides on camera gear and techniques. Have you used ND filters before?
Share your experience in the comments below, or ask any questions you still have about getting started with these helpful photography tools.

Leave a Reply